|
 |
|
|
The /newstuff Chronicles #489
Classic Doom - Posted by Bloodshedder
- 14 Comments
-
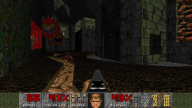
Endless Torture - Maxime Bisiaux "Datacore"
Ultimate Doom - Vanilla - Solo Play - 1.64 MB - 
Reviewed by: Sui Generis
A classic styled 36 level full Ultimate Doom megawad for vanilla, but some Boomisms in E2 and E3 will break some of the levels, so use -complevel 9 or something Boom compatible. If you enjoy straightforward levels with casual gameplay reminiscent of the IWADs, then you'll want to try this.
Maps in this set are generally small-scale and compact with lots of weak monsters. The early levels of each episode tend to be more boxy and simplistic, whilst the later levels have more sophisticated layouts and are more organic.
Gameplay is largely casual, classic stuff with plenty of low-level cannon-fodder. With single-author megawads you expect to see personal idiosyncrasies from the author - here we see a penchant for multiple single-monster closets lowering close to the player on switch presses and such, and there seem to be a few instances of rooms either full of several of the same monster or having the monsters just in front of you. It's far from the most sophisticated monster usage, but it is good, well-intentioned fun in an unpretentious sort of way, and it does help keep the flow of monsters coming.
Some of the layouts (more so earlier on) are a bit crude though. There are certainly interconnections between the different parts of the levels, but these are just windows and overlooks between adjacent boxes and corridors.
There tend to be relatively fewer compound areas made from several of these individual parts fused together - the disparate elements of the maps don't interact in a very complex fashion. Quite a few levels end up feeling like successive box clearing. That's not to say that the maps are bad, but the design of the rooms tends to be pretty simplistic, particularly in E1 and in the early maps of each episode. It must be said that things improve somewhat later though.
(I now comment briefly on each of the episodes)
The first episode follows the usual formula for E1 maps, but the levels are smaller and more cramped, and the texturing is more like a mix of IWAD E1 and E2. Generally these are good, but I single out E1M8 for criticism though as a pretty unimaginative rip-off of the original; it manages to seem similar but less interesting. Overall, this episode is OK though.
Early on, E2 treads fairly closely in the small, slightly cramped footsteps of E1, though it opens up more as the episode progresses. E2M6 suffers from a serious bug on UV, which prevents the map from being completable. A platform with the exit key does not lower as intended, because a baron on UV is placed in a 40 high sector with insufficient ceiling height, so the baron sticks in the ceiling and the platform doesn't descend. (The same issue recurs in E3M2 - apparently the wad was not tested with -complevel 3.) The secret exit in E2 is also misplaced on E2M3, so using it (and it's not very hard to find) means you skip M4 and 5.
E3 is a mixture of tech and hell (like the IWAD E3 I guess). It opens with fairly monster-dense cramped maps again, but they mix up the room size and monster ambush directions better. The maps are pretty quick and bloody, and the author generally avoids the trap of leaving the player shotgunning barons when played continuously at least. A couple of maps are very derivative though: E3M6 is a kind of hellish remake of IWAD E1M2, whilst M7 is virtually a clone of Quake's E1M2. E4's early maps are particularly symptomatic of the close-quarters "only shoot stuff in front of you" idiom. E4M3 is actually quite primitive, with a bunch of square rooms. The remaining part of the 4th episode is better though.
So overall, there's some easy-going fun to be had in this set. In spite of my criticisms of it being simple at times, the whole package is enjoyable, and of course it's uncommon to see a full 36-level megawad for Doom 1. This is worth a play in my opinion - particularly if you appreciate more old-school levels.
-
The Gateway Experiments Episode 5: Prime Directive - Ethan Watson aka GooberMan
Doom 2 - GZDoom - Solo Play - 35.04 MB -
Reviewed by: Creaphis
A thorough description of this project's content is redundant at this point. Prime Directive has already been featured as a runner-up in the 2015 Cacowards, a piece you've probably read if you're currently skimming this /newstuff, counting down the days 'til December 11, 2016. I could talk about the challenge of watching your flanks against a company of enemy marines, as they cleverly surround you via Brownian motion. I could talk about the functional architecture that combines at least four separate generations of rendering technology. I could make a passing mention of how GooberMan is pushing back against the predominately retro aesthetic of today's mapping community. (Parenthetically, I'd decry the fact that the ACS envelope has gone severely unpushed in recent years.) But, instead, I'm going to talk about something more interesting.
GooberMan released the first episode of The Gateway Experiments in January, 2003. He's pulled a George Lucas by jumping straight to episode 5, released 12 years later, but one gets the impression that this series was never far from his mind. This project is virtually unique among Doom add-ons in that it has a rich, fleshed-out backstory, and it is unique in that this significantly adds to the experience. This is a story with no clear heroes, unsolved mysteries, and echoes of trauma that happened off-screen. The dialogue is well written for the constraints of the project; similarly to Mass Effect, the story's going to end up in pretty much the same place no matter what, but it's your choice what kind of person you want to be before you get there.
If you browse GooberMan's Doomworld posts relating to this project, you can see he's already plotting the next chapters, and giving thought to the cruel realities of video game storytelling. It's the curse of creative people that their hands move far too slowly for their brains, a situation I empathize with. (I'm hoping that after a few more years of sloth, my brain will finally be running at low enough revs that my idle hands can keep up.)
Download this WAD and enter GooberMan's world. He's also uploaded a full playthrough with commentary on Youtube.
-
Storage Bay - Walter "Daimon" Confalonieri
Doom 2 - Vanilla - Solo Play - 123.25 KB -
Reviewed by: DoomLover234
I played through this WAD with Skulltag 0.98d and vanilla Doom II.
Storage Bay is a single level WAD file made by Walter Confalonieri, also known as Daimon. I was surprised when I saw it can run in vanilla Doom II. But, to be sure, I played it in Skulltag first.
The architecture throughout the map was nicely done, and effort was indeed put into details. Also, the music is super intense and makes you ready to kill some zombies!
However, the map is not challenging. It is fairly easy, but at certain places it can prove to be very challenging. The only thing is that the map is full of hitscanners, and sometimes an imp shows up. There is also a window from which you can see the water being cut off. But then again, there is a great light effect in the middle of the level and I loved it. The traps were predictable, but it's still very fun to play and pleasant to look at.
Even in vanilla Doom, it shows every single effect it shows in Skulltag. If you are looking for a map to play in a boring evening, let this one be it.
-
Glen's really old wads - glenzinho
Ultimate Doom - Vanilla - Solo Play - 329.36 KB -
Reviewed by: Sui Generis
This is a collection of 16 single-map first wads from 94-95 by the author, uploaded for posterity. You know what to expect from levels of this time, and I can confirm there are no undiscovered classics or gems here. However, if you don't mind playing old levels, then there are 3-4 I can recommend as perhaps worth trying, although to be honest even these are fairly mediocre for the time they were made.
Ten of the maps were part of an unfinished full megawad, and the other six are stand-alone maps and include the author's first efforts. The incomplete megawad mainly replaces E1, but boss levels for all episodes and the secret map for E4 are also present. Be advised that the boss levels require compatibility with version 1.666 to complete (death of any boss monster ends level), so use -complevel 1 in Prboom+.
G1M6.wad is perhaps the best map; it was also in the Doomworld Mega Project 2012. I would describe it as "Mount Erebus Lite", but with fewer buildings and psychedelic colour schemes, and with more barons/cacos. It could do with more heavy weapons for the number of monsters to be killed, but they will happily infight (or you can ignore them I guess). There's a required secret, but it's fairly intuitive.
THEPIT.wad and G1M4.wad are okayish too: THEPIT.wad is the best of the non-megawad maps. It's a big ugly hub with several monsters in and on ledges firing down into it. There are then several successive offshoots which have a few too many corridors, but there's sufficient variety in room forms and enough cannon fodder for this not to be a problem. There is a good, fun pace to this map. G1M4 is a fairly mediocre (for its time) '95 map - it uses the zigzag slime walkway from E1M1. It plays OK, but finishes in a maze with a long corridor to the keylocked exit. This sucks if you go this way without having first found the yellow key. It does generally look better than THEPIT though.
Finally, G1M1.wad is not bad, but a bit trivial, as it was intended as the first level in the megawad. It has a couple of interesting areas and progression by raising bridges.
The remaining maps are, in my view, not that great: G1M5 is boring and flat, and G1M2 might've been OK but has bad progression with backtracking. BIGSTAIR is OK, but too short and simple. Other maps are generally either bad, trivial, or have cruddy progression, but hey, this is how many Doomers started. Overall there isn't anything much to recommend to most people here, but if you enjoy old levels or you're curious to see how the author developed, then you might wish to take a peek.
-
Chaingunner's wad pack - Chainguner
Doom 2 - Limit Removing - Solo Play - 2.19 MB -
Reviewed by: Zahid
Compact, short, and pleasantly interconnected maps like most of Chaingunner's other stuff I've played. I can undoubtedly declared him as a specialist in the brief-map category after playing this mapset, although his style differs from Scythe-style, which is sort of an icon when it comes to short-mapping. I played it on UV and -nomo on prBoom+, and it took me two hours to complete it. Apart from some minor complaints, I hold positive opinions about it.
It starts off with soothing start-up music, and unique music is an element I find in most Russian wads; they have fine taste in Doom music. The first map is a small three-sector area with some baddies; it can be maxed under a minute easily, so it provides a nice intro of what is coming ahead. Oh, and neat custom HUD bar. Same story for second, third, and fourth maps: tech base style followed by little to no challenge unless you try to speedrun them.
The visuals and design are decent, but I can say the wad starts a bit dull in terms of gameplay. Then comes map 5 and 6 with relatively bigger scale and progressive difficulty, and the player gets the feeling that "Dorothy! No Kansas anymore", making these two highly recommended. After a skip-map it continues from map 12, which is tiny and basic again, not offering much fun. Map 13 gets balance back with a nice light-trick, a little final battle, and speedy action. Map 14 with its calm MIDI has a castle theme; along with map 15, both of these castle maps are solid in terms of visuals and architecture. The author focuses on exploration here with mild action.
Map 31 is a nicely detailed arena; again, more exploration and less action. Held in a tech-base, map 32 offers decent challenge with a non-linear layout. Map 16 is one of the best, as a Plutonia theme with good challenging gameplay and some nice design is here. You face archviles and finally grab the SSG, which is very rarely found in this wad.
Map 17 shows up with marble textures and quite the atmospheric start, but ends soon, as there are just 28 baddies here, along three or four small sectors. Map 18 is where author again shows some class with a nicely balanced map. It's a quite atmospheric remake of Doom 2 map 18 (Courtyard) with a fitting MIDI of mixing two or three Doom MIDIs together; I really enjoyed this one. The first BFG of the wad also shows up here.
mMap 19 is the biggest and most challenging map of the set, showing some things about Chaingunner's capabilities. Ammo balance and fights are smartly managed here; the ambiance is also worth mentioning. This one lacks interconnectivity obviously due to its scale, but a solid map for ending the wad.
By all means map 19 appears to be the final map, but for unknown reasons the author put another small map after it, which doesn't make any sense to me. So map 20, which is unexpected, didn't seems very impressive; it lacks atmosphere and has some unpleasant texture usage, although some effort can be seen in its design.
I missed berserk a lot in most maps; personally, I consider berserk a must-have power up for small maps, especially if it contains weaker monsters, as it multiples the action and makes compact maps much more fun adding Tyson style.
Another issue can be multiple keys; in such short maps they are hard to justify and make maps more predictable. Small maps make more sense without keys or with a single key. Next issue is low challenge; in most of the maps, actually half of the map presents no real threatening phases. I think Hell knights, Revenants, chaingunners, and most importantly smart usage of pigs can make gameplay more memorable in this wad even with a low monster-count.
But the author has my admiration for some lovely designs, groovy visuals, and dynamic layouts which never feel repetitive despite being on the same scale.
-
Back to square one - Memfis
Doom 2 - PrBoom+ - Solo Play - 308.92 KB -
Reviewed by: Zahid
Slender use of monsters gives a little extra feeling and atmosphere to a map because it give more leisure to admire the depth of visuals and layout. This map is quite atmospheric in a specific context. Commence with a nice view of an arena with few baddies. The progression mechanics in the map's layout are simplistic and slightly non-prominent but attractively executed. The second arena is again simple with some exploration involved. Then you enter a library; repetitive, but with some agreeable light effects. Then a little backtracking to a final room which again has some innovation in it; wooden built, giving retro a feel to it. Secret placement, along with nice music selection, yet again are elements to applaud Memfis.
Lets see combat! Well according to author's protocol, but underdone. The battles could be lot more fun if they occurred on a more colossal scale. I mean, a single medikit along with a quartet of stimpacks; the biggest monster you face is a single arch-vile. Almost 90% of the monsters are the weakest ones, even it remains non-progressive until the end. The map feels empty most of the time. As you have plenty of space, the projectile throwing enemies (in low numbers) offer no jeopardy; only hit-scanners are a threat here. The ammo balance tries to metamorphose the fun though.
Overall, this one left me with a positive feeling.
-
Demon Prince Sings the Blues - Memfis
Doom 2 - PrBoom+ - Solo Play - 245.27 KB -
Reviewed by: Zahid
It's a pleasant sight to see Memfis working with stronger monsters, as he mostly uses low-tier baddies in his maps. This level is a demonstration of the author's capabilities in generating fun combat (also written in its description), so don't anticipate an exceptional layout. It's a large hall basically with some rooms attached, including the exit area. Single key, no secrets, just pressing some switches and fighting fresh hordes of beasts. The idea is executed rather nicely. I don't know if it's planned or not, but infighting can kill half of the monsters, and you don't need to fire a single bullet; just circle-strafing would do the job until the arrival of the Viles. The ending wasn't that exciting. Predominantly speaking, catchy music, fun combat, and neat visuals gives an authentic indulgence to a Doom player at least once.
-
Nazi Camp - Memfis
Doom 2 - PrBoom+ - Solo Play - 242.76 KB -
Reviewed by: Zahid
It's a short and compact map with single key progression, a groovy MIDI, and nicely placed monsters. Ammo balance is fine too. There is a final battle which makes it exciting to some extent, as the other combat is bit dull. Has no secrets like most speedmaps. It has a mild ambiance, but not of a Nazi camp though. Nice for one play or speedrunning, but nothing memorable. Overall it's decent for a one-hour effort.
-
Telehell.wad - Fred Garlington
Heretic - Vanilla - Deathmatch - 8.96 KB -
Reviewed by: DoomLover234
I liked Heretic. I always did. It always seemed to me as all of the levels were designed with deathmatch in mind. They were mostly short and interlocking in many places. You could easily find someone and frag him.
However, telehell.wad is the worst DM WAD I have ever played. It's a disgrace, and it has just shamed Heretic's good DM levels.
The author put zero effort into it whatsoever. It is, as the title implies, a teleporter hell. There is even an energy orb arrow pointing to a hidden door! And a teleporter with no sign of it until you see blue lines on the map!
No detail. Basic textures. The level is really bland. There are many super hidden rooms. It's just bland. The only things that are not on ground level are teleporters and a hallway with a switch. No height difference, nothing.
If you want to play a good DM level, avoid this one. Play it only if you want to mock a WAD in a playthrough of yours.
-
Control Your Destiny - TimeOfDeath
Doom 2 - Vanilla - Solo Play - 11.11 KB -
Reviewed by: DoomLover234
You will not understand this WAD at first. But when you fire your first five bullets at the infamous Icon of Sin, you will get the trick.
The trick of this WAD is to shoot Romero's head to a teleporter by shooting him in different positions for a different direction. If you teleport from one of the teleporters while he is in the middle of the pit, you will be instantly killed. You only have 1% HP. And if you maybe try to walk on the walkways next to the river, you will get killed by 118 Cybies!
The first course is easy; shoot until the end of the way. There is a small pad there; place Romero there and teleport. Telefrag the head and step out to get to the second course.
Now, this one's tricky: to push him to the finish, you have to explode the barrels. Exploding them will lead the head to the very end. From there, shoot it until it is close to the pad, and when it gets on the pad (WARNING: it will not stop, it will keep moving), quickly teleport and you've finished!
Overall, TELEDEST.WAD is a WAD made for using your brain to solve different puzzles. I liked it very much, and I hope you do as well. It can be a nuisance shooting the head around, but it is kinda funny as well.
Let me guess; one of those reviewers doesn't know how to properly appreciate a WAD that you liked this week. Want to do something about it? Instead of complaining in the comment thread like you always do, perhaps you can make a difference and write some better reviews than those idiots up there. The /newstuff Review Center is the place to do so. Put that Doomworld Forums account to constructive use, because you need one to submit reviews.
|
|
|
|
|
|
|